With the improvement of our living standards and the emphasis on health, water purifiers have gradually entered our daily life.
As household refrigerators and TVs enter ordinary household appliances, in fact, water purifiers have entered our lives, so it becomes necessary to learn some maintenance knowledge of water purifiers.
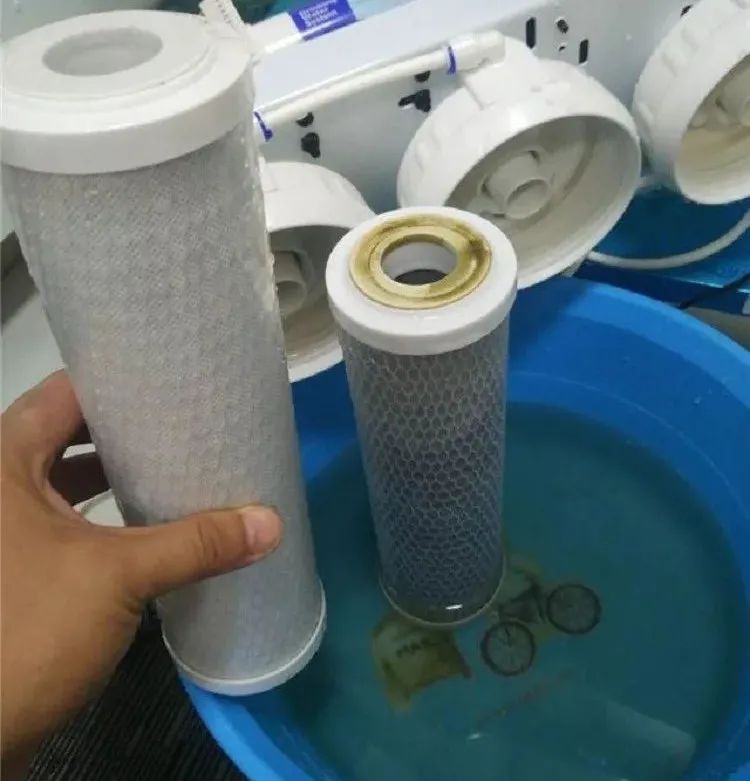
The core components of the water purifier work are the filter element and the filter membrane.
The water passes through the filter element and the filter membrane to filter out harmful substances such as sediment, and the final flow is clean water.
The water purifier has been filtered for a long time, and it will inevitably become dirty. So, how to replace the filter element of the water purifier?
Common types of water purifiers are; pre-filter, kitchen ultrafiltration water purifiers, RO system water purifiers, etc.
The pre-filter cartridge replacement
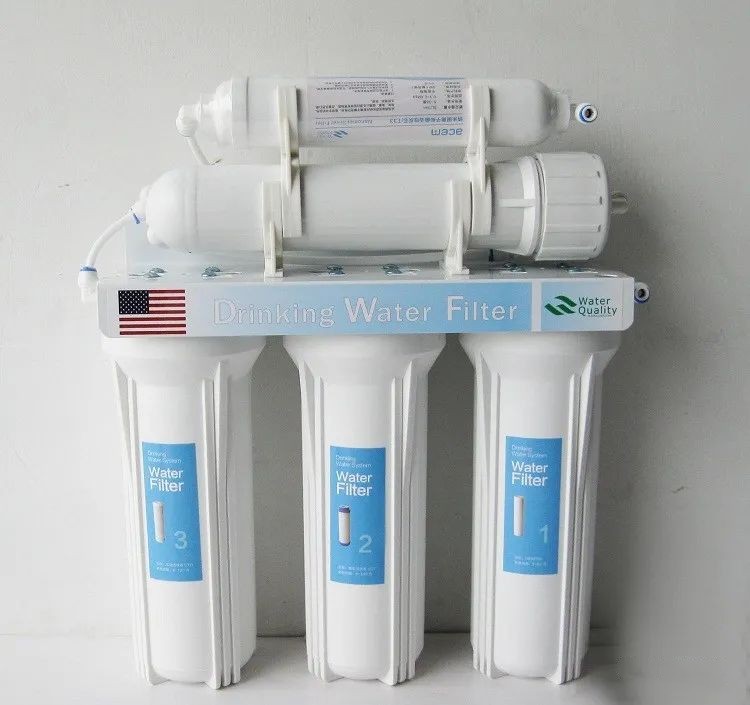
Pre-filter is relatively simple, pre-filter mainly has; single-stage, two-stage, three-stage, etc.
Replacement steps:
No. 1: Close the water inlet ball valve
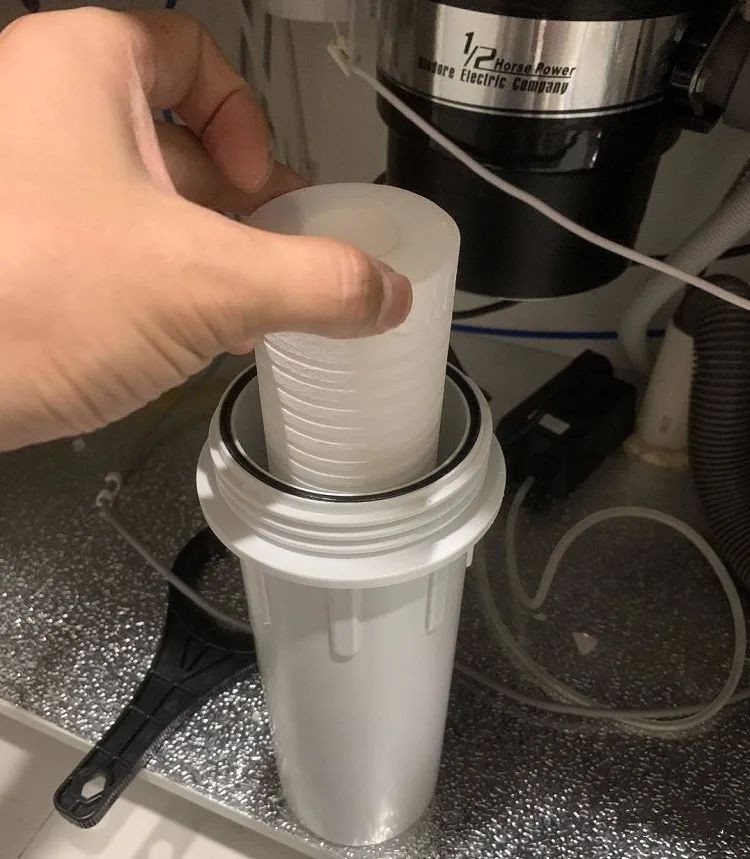
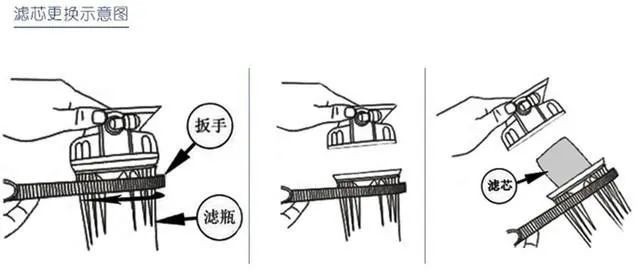
No. 2: Put a wrench into the bottom of the filter bottle, rotate it against the direction of the thread until the bottle is loose, then take off the bottle, take off the old cartridge and install the new cartridge on it, and repeat the operation for other filter bottles.
No. 3: Put the filter bottle back on, the same way as opening the filter bottle, and rotate the wrench clockwise until the bottle is tightened.
No. 4: Open the water inlet ball valve and observe whether there is water leakage.
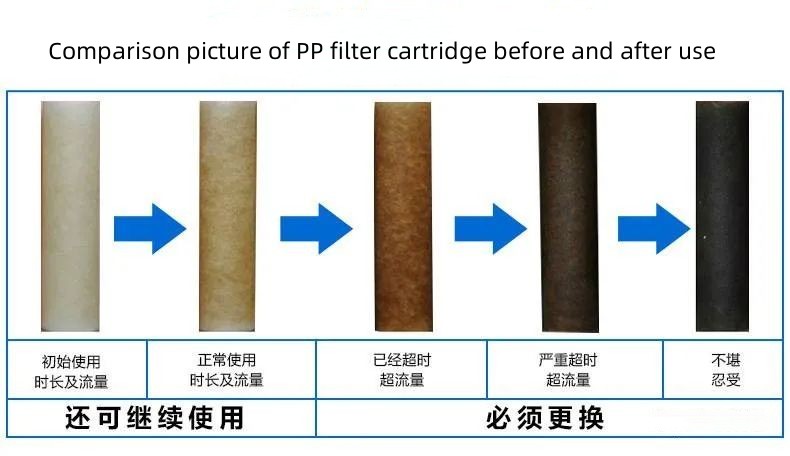
Single-stage pre-filter is generally installed with a PP melt blown filter cartridge, the normal life of a PP melt blown cartridge is about 3 months, how to determine more intuitively when the cartridge should be changed, the following picture for reference!
The kitchen ultrafiltration water purifier cartridge replacement
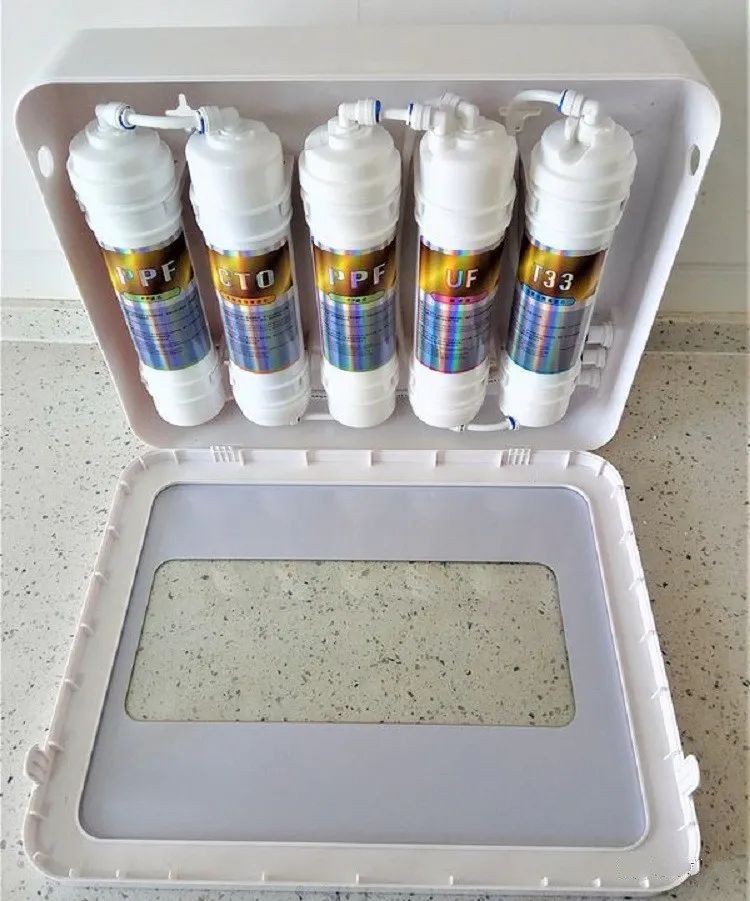
Kitchen ultrafiltration water purifier has a simple desktop and is wall-mounted with a shell, these two types of water purifiers with different cartridges, wall-mounted with a shell the type cartridge is a Korean quick connect cartridge, a simple desktop with a common filter cartridge, first introduce the simple desktop water purifier cartridge replacement
Replacement Steps
No. 1: Close the water inlet ball valve, open the gooseneck faucet, and empty the remaining water and pressure inside the water purifier.
No. 2: Put a wrench into the bottom of the filter bottle and rotate it against the direction of the threads until the bottle is loose, then remove the bottle, take off the old cartridge and install the new cartridge on it.
No. 3: Open the ultrafiltration membrane shell (there is a special membrane shell wrench), the method is similar to opening the filter bottle, then taking out the old membrane and replacing it with a new one.
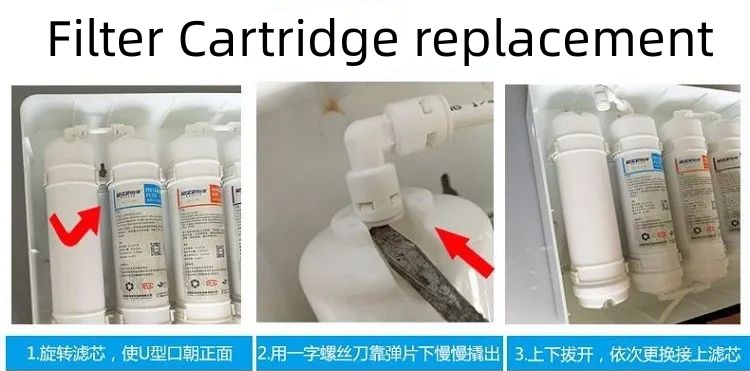
No. 4: Use the tool to pry open the snap on the post-active cartridge, remove the old cartridge, replace the new cartridge, and then snap the snap again.
No. 5: Open the water inlet ball valve and observe if there is any leakage.
Wall-mounted ultrafiltration water purifier cartridge replacement
No. 1: Close the water inlet ball valve, pry open the water purifier shell with a tool, faucet to empty the remaining water, and pressure
No. 2: Use the tool to pry open the cartridge on the cartridge, then replace the new cartridge, and re-buckle the cartridge, other cartridges can be replaced in order
No. 3: Reinstall the shell and press firmly
No. 4: Open the water inlet ball valve, and observe whether there is water leakage
The reverse osmosis water purifier cartridge replacement
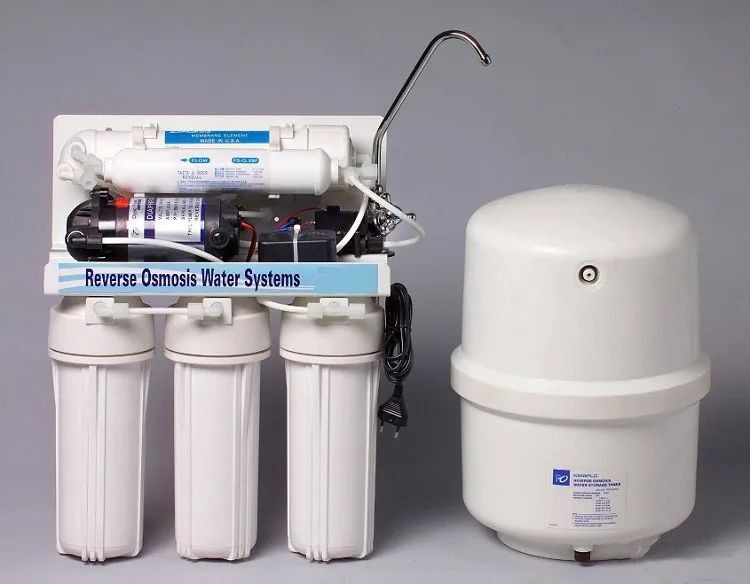
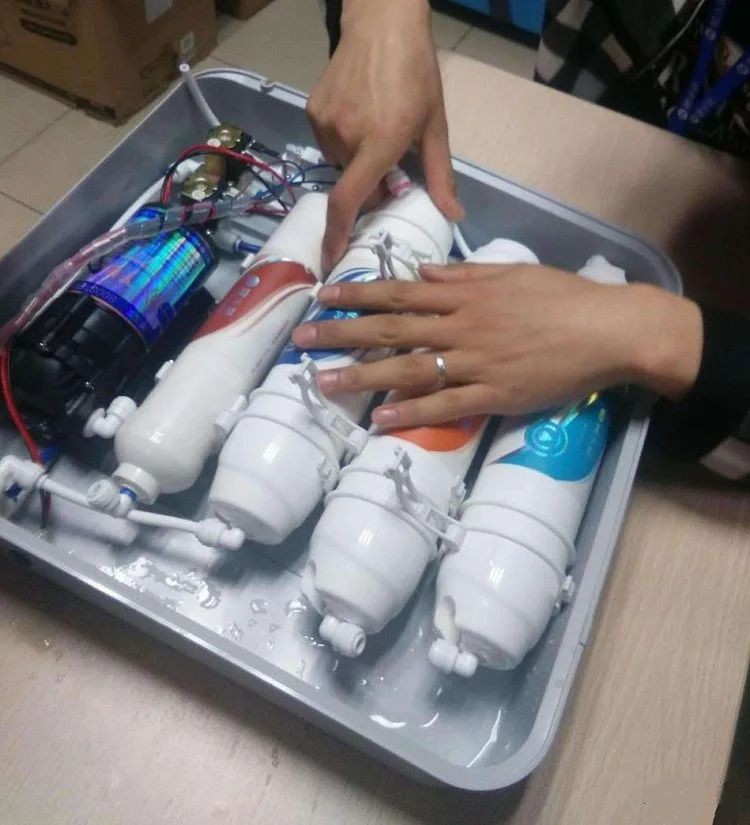
The common reverse osmosis water purifier also has a simple desktop and wall-mounted with a shell, cartridge basic, and ultrafiltration water purifier, reverse osmosis water purifier requires pressure, so more booster pump, the need for electricity, and then with a pressure tank, replacement steps than ultrafiltration water purifier to be more complex, first look at the replacement of simple desktop reverse osmosis water purifier
Replacement steps
No. 1: First turn off the power, then close the water inlet ball valve and wait for the machine to stop, to ensure that the water purifier for the power off state.
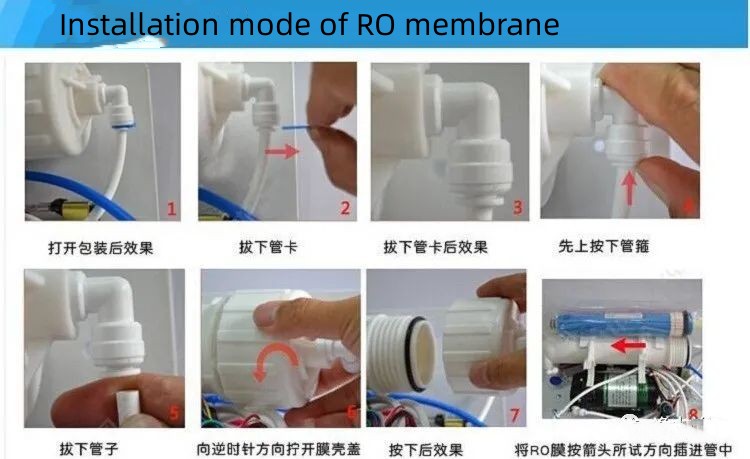
No. 2: Unplug the faucet water pipe, pressure tank water pipe, waste water pipe, and especially the inlet pipe of the RO membrane cartridge to avoid clogging of the RO membrane.
No. 3: Then remove the filter bottle, take off the old cartridge and install the new cartridge on it.
No. 4: Open the RO membrane shell (there is a special membrane shell wrench), the method is similar to opening the filter bottle, then taking out the old membrane and replacing it with a new one.
No. 5: Use the tool to pry open the snap on the post-active cartridge, replace the new cartridge with the old one, and then re-snap the snap.
No. 6: After installation, reconnect the water pipe, and pay attention to the installation to avoid water leakage.
No. 7: All back to the original installation in place, open the water inlet ball valve, and turn on the power (pay attention to observing the filter bottle cover, water pipes, and other locations to avoid leaks).
No. 8: Wait 20 seconds, open the faucet, let it drain for about 10 minutes, activate the cartridge, and empty the dirty water some time ago, so that the installation is complete.
Wall-mounted water purifier cartridge replacement
No. 1: Turn off the power first, then close the inlet ball valve and wait for the machine to shut down to ensure that the water purifier is in a power-off state.
No. 2: Use a tool to pry open the shell, open the faucet to empty the remaining water, and pressure
No. 3: Use the tool to pry open the cartridge on the cartridge, and then replace the new cartridge, re-buckle the cartridge, and other cartridges in order to replace
No. 4: Reinstall the shell and press firmly
No. 5: Restore the original installation in place, open the water inlet ball valve, and turn on the power (pay attention to observing the filter bottle cover, water pipes, and other locations to see if there is a leak).
No. 6: Wait 20 seconds, open the faucet, let it drain for about 10 minutes, activate the cartridge, and empty the dirty water some time ago, so that the installation is complete.
Through the above introduction, you can find that the water purifier replacement cartridge is actually not trouble, as long as the above steps to operate can be easily done, if you are worried that they do not have the relevant expertise, you can replace the cartridge before the water purifier pipeline with a cell phone to take pictures down, so as not to end up not knowing how to install back, if you do feel the trouble, you can also contact our sales engineers to guide the operation for you online.
